1 Introduction
In order to create from scratch and have you own custom VM image available in Windows Azure, either :
- you are using Microsoft System Center and could perform the below tasks easily,
- or you could do it manually, i.e. go through a long process, yet relatively simple and intuitive.
This document presents the second alternative. By doing it manually, you will understand under the hood how Windows Azure IaaS is working.

Table of content:
1 Introduction
2 Creating a Hyper-V virtual machine
3 Converting the virtual machine for Azure
3.1 Snapshot your VM!!
3.2 Convert YOUR VHDX into vhd
3.3 Step 1: Prepare the image to be uploaded
3.4 Step 2: Create a storage account in Windows Azure and prepare WIndows Azure
3.4.1 Installing AND CONFIGURE Powershell for Windows Azure
4 UPLOADING the VHD into Windows Azure
5 Create your Windows Azure Image from the vhd your uploaded
6 Conclusion
Pre-requisites: In my case, I am using Windows 8.1, with Hyper-V activated.
Open your Hyper-V management console :


ViseoBI-FormationSAP-BO-WinSrv2008R2SP1-fr


For the training VM ideally 8000 MB (8GB) : (from my computer, I can only put 3000 MB)


Choose Intel(R) 82579LM … so that Internet could be activated


You could also choose a smaller size such as 50 GB to speed up upload time.
Choose the ISO of the OS that is automatically be installed on the VM. In ou example, let consider Windows 2008 R2 SP1 Enterprise French
fr_windows_server_2008_r2_with_sp1_x64_dvd_617591.iso


Start the VM

The OS starts is installed automatically:


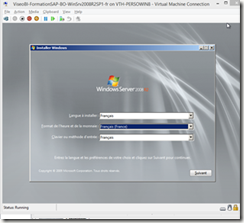
Click “Installez maintenant” > “Win Serv 2008 R2 version complète!“
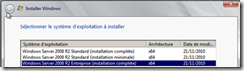
Choose « Personnalisé (option avancée) »
Install on « HD 127 Go »

Set the password of the Admin

You could either disable all IE security rules or install Firefox. See appendices a direct link to get Firefox

The virtual Machine under Hyper-V (Windows 8.1) is composed of 3 files
ViseoBI-FormationSAP-BO-WinSrv2008R2SP1-fr.vhdx (7 GB)
ViseoBI-FormationSAP-BO-WinSrv2008R2SP1-fr_BB96011B-1119-462D-8EB1-6880C2EBF187.avhdx (1 GB)
ViseoBI-FormationSAP-BO-WinSrv2008R2SP1-fr_CEE7D61D-AA09-4D55-A6CE-B9E2DE8BFB9A.avhdx (12 MB)
As per today, the format to be uploaded into Azure is *.vhd (and not *.vhdx). Hence a conversion is needed, on the top of sysprep.
Documentation here: http://www.windowsazure.com/en-us/documentation/articles/virtual-machines-create-upload-vhd-windows-server/
Once this vhd is prepared, it is called “image”
In order to back it up, in case the SystPrep fails!
As we speak, Windows Azure IaaS only supports VHD (i.e. legacy and fixed size hard disk). You will want to convert your VHDX into VHD.
This could be done easily with Powershell: PS C:\> Convert-VHD –Path c:\test\MY-VM.vhdx –DestinationPath c:\test\MY-NEW-VM.vhd
C:\Users\Public\Documents\Hyper-V\Virtual Hard Disks> Convert-VHD .\ViseoBI-FormationSAP-BO-WinSrv2008R2SP1-fr.vhdx vmForAzure.vhd

Conversion in progress
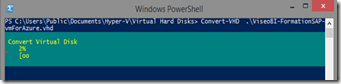
It is only a matter of a few minutes job
Then renamed into ViseoBI-FormationSAP-BO-WinSrv2008R2SP1-fr_ReadyForAzureImage.vhd
More information : https://blogs.technet.com/b/cbernier/archive/2013/08/29/converting-hyper-v-vhdx-to-vhd-file-formats-for-use-in-windows-azure.aspx
In order to declare your VHD as a Azure Drive, you will have to SysPrep it, with “Generalize” option.
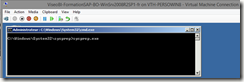
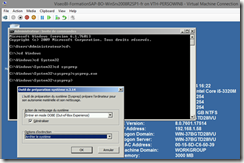
Prerequisites:
See here: http://www.windowsazure.com/en-us/documentation/articles/install-configure-powershell
Within a minute the install is complete.

Now you have Powershell for Azure installed, you will have to provide the proper authorization to your Powershell CommandLet to access your subscription.
To do so, just carry on following the steps documented in the previous URL,

which will open a web browser to ask you your Windows Azure credentials (your usual Microsoft Account Login and Password).

If you have many subscriptions, choose the proper one, which concerns the VHD you want to upload:

Now your Publish Setting file is being prepared for you and it is downloaded (bottom left : *.publishsettings):

Now import your Publish Settings credentials on your computer, so that the CmdLets will have the proper authorization to publish into your Azure Subscription.

Now you have your PublishSettings configured on your computer, you could start to upload your VHD.
PS C:\> Add-AzureVhd -Destination http://visbisrvsapnoeustoacc.blob.core.windows.net/vhds/VISBT-WinSrv2008R2Fr-Base001.vhd -LocalFilePath 'C:\Users\Public\Documents\Hyper-V\Virtual Hard Disks\ViseoBI-FormationSAP-BO-WinSrv2008R2SP1-fr_ReadyForAzureImage.vhd'
(PS: An alternative of the Powershell “Add-AzureVhd” is the CSUpload.exe. Doc: http://msdn.microsoft.com/en-us/library/windowsazure/gg466228.aspx )
Before the upload, the Powershell starts by calculating MD5 Hash:
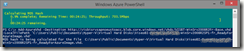
(note the if you have optical fiber the Throughput could be 1535 Mbps, or even faster)
Within 3 min the MD5 Hash calculation is over.


Don’t’ worry if you don’t see manything going on in this process, the Powershell is doing its job behind the sceen, as we can see with Fiddler:

Now, after the message “creating new page blob of size”, it is time for THE upload, which is the most time consuming part of this process. i.e. you can relax and wait few hours (3 to 6 hours, depending on your bandwidth). Strangly enough, after about 10 min my Throughput drops to 0.1Mbps.

AFTER FEW HOURS, you can now see your VHD in Windows Azure portal, but still not usable yet, because “just” a VHD, not yet an image (because a VHD could either be an “Azure VM Image” or an “Azure VM disk”, depend on how you prepared it)

Time to convert your *.vhd into a Windows Azure Image!
Under “All Items”, choose “Vistual Machine”

NOW your image is re-usable a multiple time, such as any ‘regular’ Windows Azure IaaS VMs that is provided by Microsoft.
DONE!!!
Don’t forget, this is relatively a long process since we are doing it manually. Use tools such as System Center, or CmdLets of Redgate, or wait for the fortnight Windows Azure portal imrpovements so that this could ease your Admin life!